Saturday, July 21, 2012

Tomato Pie

Although the original recipe called for a pie dish- I first used a spring form pan, only to realize that even that was unnecessary.  The buttermilk biscuit crust is strong enough to hold in the tomatoes, freestyle- all on its own.  Make sure you give the dough time to chill- it is much easier to work with.


for the crust:
  • 1 1/2 cups all purpose flour
  • 1/2 cup whole wheat (or whole rye) flour
  • 1 1/2 teaspoon baking powder
  • 1/2 teaspoon baking soda
  • 1/2 teaspoon salt
  • 6 Tablepoons chilled, unsalted butter
  • 1 cup buttermilk or keifer
for the filling: 
  • 2 pounds ripe tomatoes, cut into 1/4 inch slices
  • 2 1/2 cups shredded Cumberland cheese (or chedder)
  • 1/4 cup parmesan cheese
  • 1 scallion, thinly sliced
  • 1/4 cup cream
  • 1 Tablespoon apple cider vinegar
  • 3/4 teaspoon salt
  • 1 Tablespoon cornmeal
Make dough for crust: Rub the the butter into the flour, salt, and powders with your fingers until it resembles a coarse meal, with some small chunks of butter.  Gently stir in the buttermilk, either with your hand or a fork.  Knead very briefly, until the dough just comes together.  Form into a ball, wrap with plastic, and chill in fridge for at least an hour

Preheat oven to 425 degrees F.  Layer the tomato slices between a clean kitchen towel.  Let sit about 20 minutes to dry.  

Unwrap the dough and very gently roll out into a 11 inch circle.  Use flour if you need to, but keep it at a minimum.  The key is to work very quickly, and don't press to hard as you roll.  If you lift the dough often and lightly flour it, it should roll easily.    Place dough circle on a baking sheet- or in a pie dish.  Stir together vinegar, scallion, salt, and cream. Mix the cheeses together- reserving 1/4 cup for the top.

Sprinkle cornmeal on the bottom of the circle, if in a pie dish, or in a 9inch circle, if just free-form.  Sprinkle about 1/2 cup of cheese, top with about 1/3 of the tomato slices, drizzle with about 1/2 of the cream mixture, top with cheese, more tomatoes, and the rest of the cream.  Top with the rest of the cheese, the rest of the tomato slices, and then sprinkle the reserved 1/4 cup cheese on top. Top with freshly ground pepper.   If you are doing this freeform, just keep piling the filling up, making sure to leave about a 2 inch border.  

Fold the edges over the filling.  If you are not using a pie pan, make sure they are securly crimped and folded, to keep the crust from falling open and the filling leaking out.  

Bake til crust is golden and cheese is brown and bubbly- about 35 minutes.  Let cool at least an hour or two before eating.  


Thursday, July 12, 2012

Two Great Things are Just About to Happen


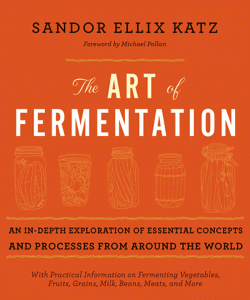
COME AND LISTEN (and eat fermented food)! On Thursday July 19th, one week from today,  Sandor Katz is coming to Chattanooga to talk about his new book The Art of Fermentation.  Afterwards, there will be fermentation sampling and mingling.  More information here: slowfoodchattanooga.com


COME AND SEE (and buy fun, fancy, and functional stuff)!  On Saturday July 21st, Artifact will be hosting a Wearable Show, as well as an open-studio.  I will be contributing a small amount of my own wearables.  There will be iced tea, and piles of summery clothes and accessories, as well as prints, paintings, and pots.  More information here: http://teamartifact.com/


Thursday, July 5, 2012

Pickling Right Along


Also adapted from Canning For a New Generation come the not-too-sweet bread and butter zucchini pickles.  She uses ginger in her recipe, but I didn't have any.  It sounds super good, but I couldn't wait so I did without.  I also added a little more sugar (but not much) and a little less turmeric (because I ran out).   One jar didn't seal, so, unlike the turnips, I can assure you with all certainty that these pickles are delicious.  They go perfectly with a little rye bread and Dancing Fern cheese.  And, they're made from zucchini.


Bread and Butter Zucchini Pickles
makes about 6 pints
takes 2 days, or one very long day (8 hr-overnight ice bath)

  • 4 pounds zucchini, washed and beheaded
  • 1 pound sweet onions, peeled and halved
  • 1/4 cup plus 1 Tablespoon kosher or pickling salt 
  • 2 Tablespoons whole coriander seeds
  • 1 Tablespoon whole yellow mustard seed
  • 2 teaspoons crushed pepper (or 1 teaspoon minced dried cayenne)
  • 6 cups cider vinegar (5% acidity)
  • 1 1/2 cups water
  • 1 cup sugar
  • 1 teaspoon turmeric
  • (6 rounds fresh ginger if you have it)
Cut zucchini into 1/4 inch rounds.  Thinly slice onions.  Place together in a large bowl and toss with 1/4 cup of salt.  Cover with a healthy layer of ice cubes and let sit in the refrigerator 8 hours, or overnight.  Pull out any unmelted ice cubes, drain, rinse well, and drain again.  Toss with coriander seed and pepper flakes, set aside.  

Sterilize clean jars in a canning pot of boiling water, and let jars sit in warm water while preparing the vinegar.
Place new jar lids in a heat-proof bowl and pour boiling water from the pot over them- also leave in water til needed.

Combine vinegar, water, sugar, turmeric, and 1 T salt in a pot.  Bring to a boil.  Drain the jars and gently stuff the zucchini in, being sure not to pack too tightly.  If using ginger, throw a slice in the bottom of each jar first.  Carefully ladle or pour vinegar into each jar, leaving about 1/2 inch headspace.  Run a clean chopstick around the side of each jar to remove large air bubbles- the zucchini tend to fold up against the sides and trap air in them.  Screw the lids on well, but not too well (til "finger tight"), and process in a boiling water bath for 15 minutes.  Place on a dry towel and don't move jars for 12 hours.  Check to make sure all are sealed (buttons on top will be popped down), and store in a cool dry place.  They can be eaten after 3 weeks, although I tried my unsealed jar after 1 week and they were still amazing.